CLICK HERE FOR FREE BLOGGER TEMPLATES, LINK BUTTONS AND MORE! »

Friday, October 17, 2008

A Handmade Halloween With Etsy

A Handmade Halloween With Etsy
As originally posted on the H&G Buzz Blog on Cafemom

A Handmade Halloween With Etsy

October 17, 2008 at 1:00 PM by Cafe Sheri - Comments (2)

You've heard of Etsy, right? Well, if not, then you should know that Etsy's the coolest, most action-packed online craft fair in America! There are thousands of crafters and artists on the Etsy site, and the merchandise is changing all the time.

In fact, right here on CafeMom, there's a group for CafeMom Etsy Moms, open to any CafeMom who sells anything on Etsy. And now through October 31st, several of the CafeMom Etsy Moms are having a Pre-Holiday Sale. Don't miss it!

Here are a few of my favorite handmade Halloween items for Home from the CafeMom Etsy Moms shops (available while supplies last):


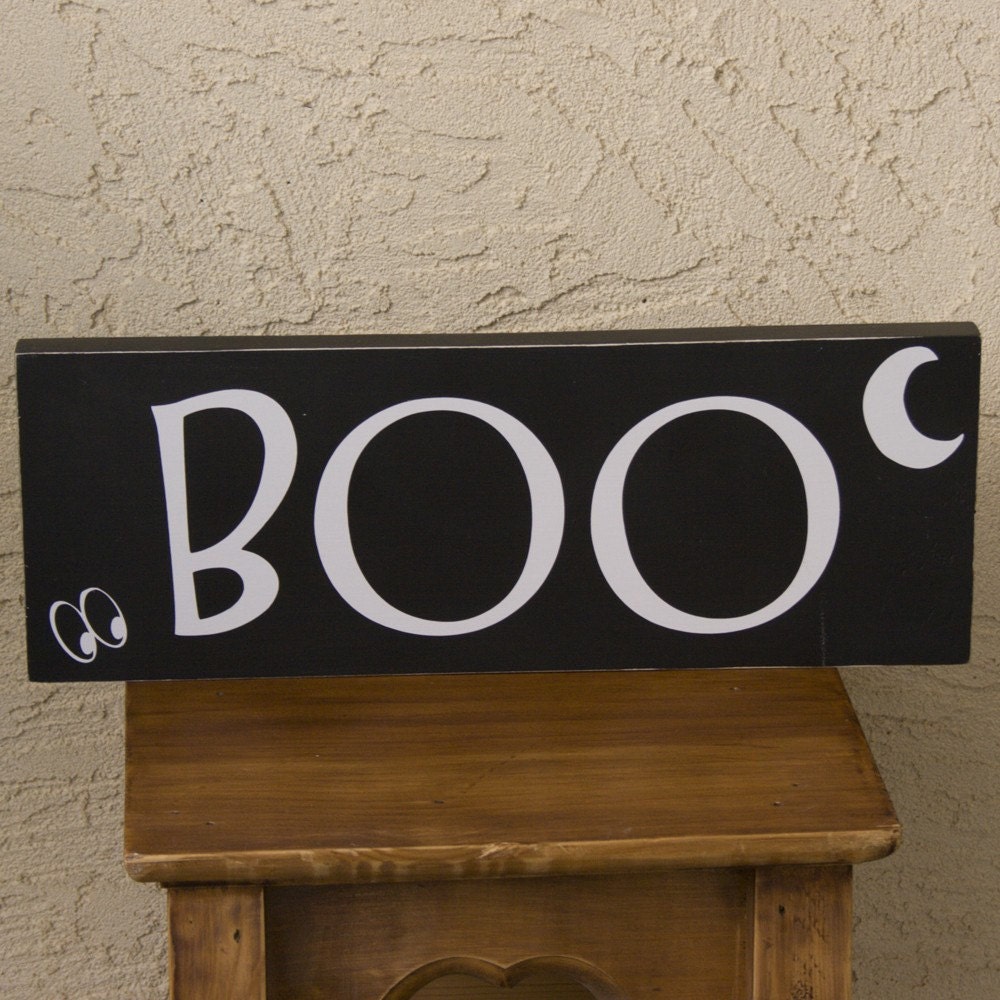
"Boo" Vinyl Board from caligirlcrafts (aka CafeMom caligirlcrafts), $9.95


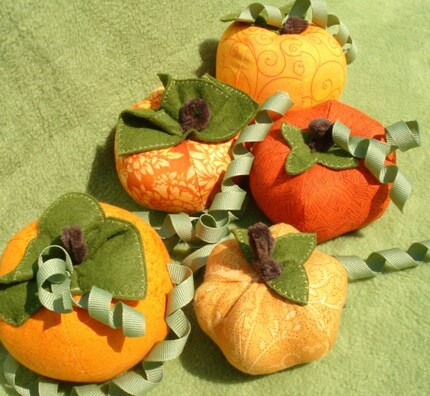
Harvest Pumpkins, set of 5, from ae baby (aka CafeMom aebaby), $16.50


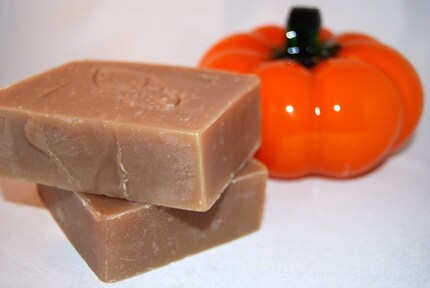
Spiced Pumpkin Scented Soap from Cosmic Clean Body (aka CafeMom Celyn4), $4

Fall Pumpkins Table Runner from Cozy Cabin Creations (aka CafeMom cozycabinmom), $10
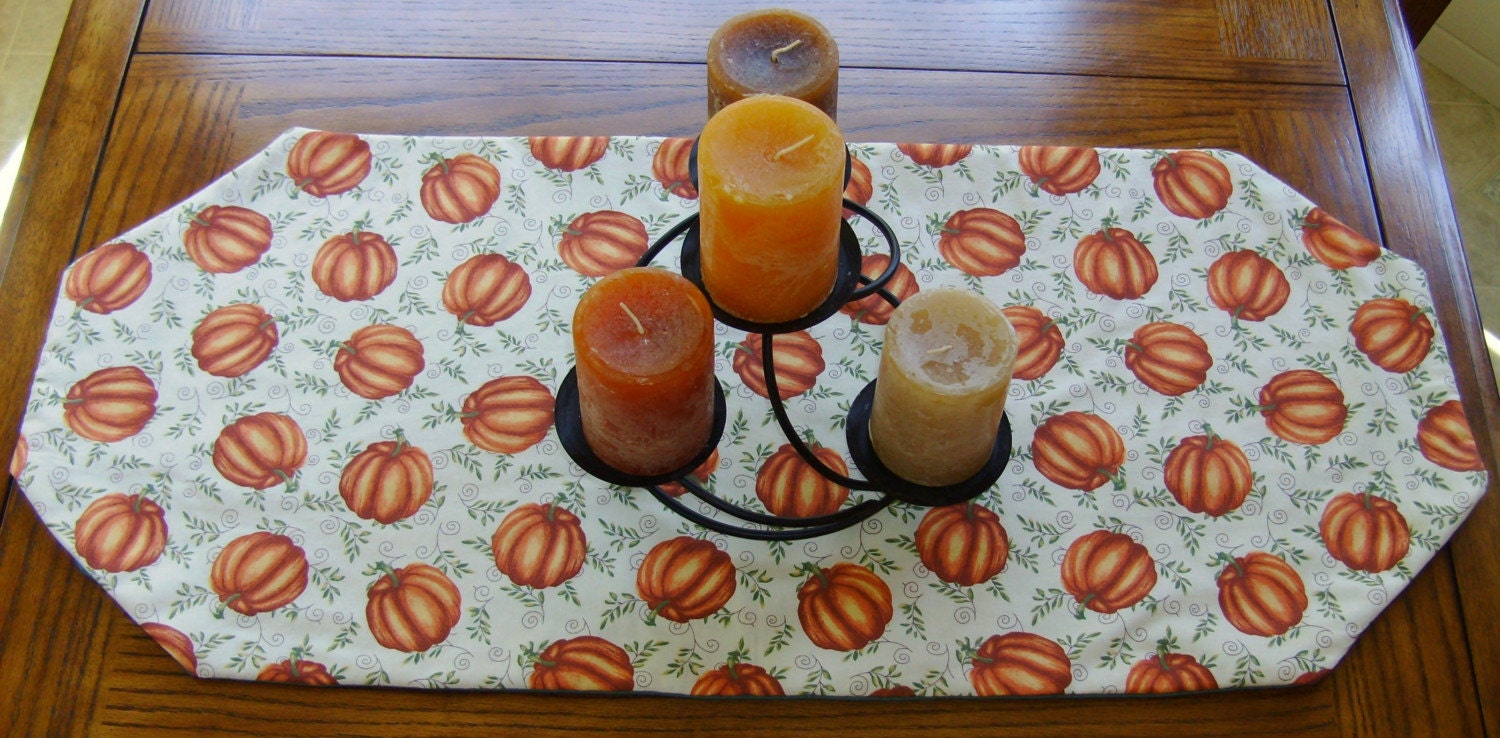
Baby Gear: Fab Stuff Made by Real Moms (featured on CAFEMOM)

Baby Gear: Fab Stuff Made by Real Moms


Photo by aebaby

I have to say, it's been wonderful to explore all of the cool stuff happening on CafeMom! There are so many great groups and stories and moms to meet. My friend Cafe Sheri, who is also the Home & Garden blogger, told me about CafeMom Etsy Moms -- and I'm so impressed with them! Some of these fabulous mamas are creating beautiful things that you need for your baby -- you've gotta check it out.

Etsy connects people (like me!) willing to lay down cash for cool handmade stuff with the artists that create it -- and there's a gang of these mamas here on CafeMom. aebaby makes beautiful baby things -- diaper and wipes holders, blankets, toys, super-cool car seat covers -- that I covet. Also, I'm just amazed with her incredible DIY talent! I asked her a few questions about what she does and why:

How did you get started making baby things?

"It was a natural to begin making baby things when it became near and dear to my heart almost six years ago with the birth of my son. I love the whimsy and freedom that comes with being a child; polka dots, fairy princesses, and silly elephants. I'm a stay-at-home mom with two energetic preschoolers and the aunt of a crowd ranging from 8 months to 4 years -- and I love sewing for children!"

How long have you been doing it?

"I've always been sewing. As a child working on a simple pillow, through college making extra spending money tailoring, then making baby blankets, Cinderella ball gowns, and toys for my family. I love the challenge of creating and learning and making new things. I also draw on my degree in recreation, knowing how children play and interact with their world and others during the different stages of development helps."

What's your absolute favorite thing that you've made so far?

"Every new thing I make is my favorite; they are always being replaced with the next creation. My kids have their favorites -- my daughter loves the Sugar Cookie Bake Set and my son loved a Frog Chair I made."

What about you? Are you a DIY-queen (or wannabe)? Are you making something for your baby-on-the-way? Tell us about your creative side in the comments below.

Posted using ShareThis

Tuesday, October 14, 2008

Still Looking For Halloween Costumes?

So... Your like me... the last minute person.... Searching through your local Wal-Mart... Looking for whats left of the Halloween Costumes? And you pass up on the Dorothy that looks she was from "the wrong side of the yellow brick road" and put back the $30 Made in China Bumble Bee Costumer that looks something like Charlie Brown's Shirt with that squiggly line.....

So, here you are... searching Etsy... looking for that PERFECT costume... The one you know that your little angel (or devil) Will just love!

So... I'm here to help you out! Here are some awesome costumes, that are ready by Halloween made by some Cafemom Etsy Moms!


This is a Spooky Gothic Bat Girl Costume by Tiara's Tutus. Which also happens to be one of my NEW favorite Etsy Sellers at the moment. I love the purples and teals in the tutu along with those tiny, adorable bat wings! What a creative momma!


Ah, and heres another cutie in Tulle! Trinity's Tutus has this adorable made to order Tinkerbell Tutu Dress. It is absolutely full to the brim of pretty shades of green tulle! Big pink flowers and a big pink ribbon set this costume off perfectly!


One of the more eclectic shops on Etsy... and believe me, I mean that in the MOST respectful way! Another Favorite Seller, Pumpkinhaus! This is her "Frou Frou Skirt" . Made from Witchy Fabric and full of color, and texture! What Little Girl wouldn't LOVE wearing this for Hallowen? It will be perfect for the skirt of a Witch's costume, or even something cute to wear over leggings when going out! Be sure to check out Pumpkinhaus' shop for all kinds of cool, kooky, and "Hey, I never thought of that" kind of stuff!


And Just in Case you haven't had your daily dose of ADORABLE! Here is a Totally Cute idea and tutu by Maggie's Rose Garden! Any mom who is ANY mom has heard of Gymboree, and we all have seen the adorable lines of matching clothes they have. Well, Maggie's has come up with such an adorable tutu to put your little punkin' in for halloween!

I just love how the tutu goes so perfectly with the pumpkin hat, tights, and sweater. If you haven't got that costume yet, you have got to hit up Gymboree, and Maggie's Rose Garden!


And of course, I will add my Halloween Costume Too! Just to give a spin on the everyday tutu, I, Rockerchic, have added large wire ribbon and strips of fabric for a completely shabby look!

This is my favorite Tutu in my shop with purple spider web fabric, and white with black polka dot fabric... along with black tulle and a spider wire ribbon for a totally spooky look!


This is a SMALL taste of what our CEMs have to off you for halloween this year. Throughout our shops we have clothing, costumes, jewelry, and home decor for Halloween, Fall, and all year round!

While your browsing etsy, make sure you search for the tag "cafemom team" you'll be so glad you did!

Hope you all have a SPOOKTACULAR HALLOWEEN! Lots of Handmade Love and Wishes for a Safe Halloween from all the super cool Chics over at Cafemom Etsy Moms Street Team!

Kristie (aka Rockerchic)

Saturday, October 11, 2008

Caramel Apples for Halloween and Fall

AppleBIG.gif

The caramel coating is very gooey, so refrigerate the apples for about 15 minutes, or until the caramel has firmed up.

INGREDIENTS

6 apples

1 (14 ounce) package individually wrapped caramels, unwrapped

2 tablespoons milk

DIRECTIONS

  1. Remove the stem from each apple and press a craft stick into the top. Butter a baking sheet.
  2. Place caramels and milk in a microwave safe bowl, and microwave 2 minutes, stirring once. Allow to cool briefly.
  3. Roll each apple quickly in caramel sauce until well coated. Place on prepared sheet to set.

Check out my Etsy shop!!!

Check out my Blog too!

Friday, October 10, 2008

Making Double Fold Bias Tape


Bias tape is a strip of fabric cut on the bias and then folded to finish the edge of a sewing project. It has some stretch so it will easily go around corners and curves, most often used on the bindings of quilts and blankets. It is easy to make and will not only save you a little change but a matching binding will look so much nicer than a solid color from the store. Here is how:
  1. The easiest fabric to use is a cotton or cotton blend because it will make a sharp crease when ironed. wash and dry your fabric.
  2. Begin by laying your fabric flat. Take the cut edge of the fabric and fold it up to meet the selvage edge. So the fold will be on the diagonal, the fold is the bias- there will be a lot of stretch to it. Press this fold with the iron and then unfold.
  3. Cut a strip of fabric along the pressed edge- if you want a 1/2" double fold bias tape make the cut 2" (the math is: width of finished tape x 4 = width of cut) Cut as many strips as you need for your project
  4. Join the strips by overlapping the ends of two strips at a 90 degree angle. Pin and mark from corner to corner and sew along the marked line. See photo below.


5. trim your edges to 1/4 inch and unfold, it should be one continuous strip, if it makes a corner instead of a long strip, the stitch line was from the wrong corners just trim it out and start over

6. Folding -begin laying your strip out on the ironing board and folding one long edge almost to the middle, press and do this for the entire length of the connected bias strips


7. Repeat for the other long edge


8. Fold the bias strip in half so the two folded edges meet. Finished!


Thursday, October 9, 2008

Tips for a Great Craft Show!


So, you've signed up to do your first craft show? Great!

So, now what do you do?

Ok, so lets start with some simple basics.....

Have plenty of merchandise at all price points. If you have lots of lower priced things, people tend to purchase more than one of those at a time. Think of the "add on" sale. Make peices that coordinate each other so you can make even more money by selling things together as sets.

Have something for the kids. Even if your craft is not child specific. Bring at least 2 or 3 types of items for the kids. Parents are suckers for buying for the babies! A little necklace, or pillowcase dress, even a small doll, or a mug for them to drink out of, all of these are great ideas for kids. And they can range in price from very low to very high.

Have your Set up prepared, and ready to go for the day of the show! There is nothing more stressful than running around trying to find everything last minute for your show.
Here are some basics you'll need:
A Tent of course, At least 2 six foot Table, Table Covers, and displays for your products
These are the Big things.
And here is some advice on setting up a professional looking booth:

Remember, the goal here is to bring people IN, not have them walk by without giving you a second glance! So.... remember the horseshoe or U shape.... Set your tables up with two on the side and a smaller one in the middle of the back. This brings people in, giving you a chance to welcome them to your area, and them to get a hands on feel for your merchandise.

Use Risers. Set the Back of your booth up high, and then lower it as it gets to the front. This way there are some items eye level, and it also gives a nicer appearance. Appearance is a VERY KEY selling tool! You have worked yourself to death, getting ready for this show... Why would you just throw your stuff out there just any old way? Make it look good!

Advice on raising your items:
Use the boxes you brought your crafts to the show in, and put them underneath a table cover, then flounce the table cover around. You can also put larger boxes in the floor in front of the table, covered with table covers and topped with merchandise. This way you are utilizing all of your space and getting as much of your product out as possible.

And if you would like to buy professional looking displays there are lots of links online that you can buy these from. Or if your lucky like me, you know someone in the retail industry that you can simply borrow these displays from.

Ok, so now we have our merchandise, and we have our setup.... What else did we need to bring?
Here are some essentials, you'll be so glad you remembered to pack:
Lots of pens
Business Cards
Receipt Book
Scissors
Ribbon or string
Extra Price Tags
Duct Tape
Safety Pins
Calculator/Adding Machine
A small table to work on
A money apron, not box... keep your money on you...

And speaking of price tags: Remember to price all of your merchandise! Some people may be interested in your items, but are afraid to ask for the price. If you price each one, or have a Clearly printed or Typed Sign then you will have a better chance of selling your items.

How far are we now? We have merchandise, we've priced it, we have our set up, and our extra stuff.... We sound like we're ready for anything right?

WRONG!!!!!

The first, most important rule of doing your own craft show:
SPEAK TO EACH CUSTOMER!
Young and Old.... You MUST speak to each customer! Tell everyone hello, welcome them to your booth. Let every customer know that you are there to answer any questions they may have.

Also, pick out your favorite piece. Anytime you can, you show that piece to customers in your area. They may say: "My, your things are beautiful" and you reply with: "Let me show you my absolute favorite!"

Strike up a conversation with this! If they don't particularly like this one, find out what it is about it they don't like, then you have a better idea of what they are looking for and you can go from there.

And if you find the perfect item for them, and they simply can't afford it, give them your business card at that point. It may also be helpful to let them know that you sell it higher online, and if they got it now, it will be X dollars less and no shipping fees.

Remember to be polite! Say yes ma'am, no sir, please and thank you. These are your customers, and you would like to take home a little of their money.... Also, you would like to hear good feedback about your craft too... So, being nice is a vital part of selling your items!

And make sure you let people know a little bit about the creation process..... "Did you know it takes me 7 hours to make each of these!?!" Or "I make all of my own dyes for this". Anything that they can tell their friends, "I got this from rockerchic, she sells on a website called Etsy, and she said it takes 7 hours to make each one of these dolls" And then, always make sure, you let people know your special order policy.... You can have 52 dresses, in 51 different colors, And surely the ONE color you did not bring, is the ONLY color anyone wants that day! Be sure you let everyone know that you are able to do these things, how they can get in contact with you, and how long your turnaround is. Everyone wants something made just for them, their idea, so why not accomodate that?

Ok, Ok... so this is getting much, much longer than anticipated... so I'll close up with these last little tips:

If you can wear it.... WEAR IT! If you have clothing, for goodness sakes... wear it... you make tutus for kids? Wear one yourself! Jewelry? Wear it! If you make toys, stay by the front of your tent and play with the toy. Display, and Demonstrate. Two of the most important selling tools. Display properly, and Demonstrate the use of your products!

NEVER, talk on your CELL while a customer is in your booth! When a customer walks into your area... You stand up, You welcome them, You let them know you are available to help them... You can even butt in and start showing them your favorite items. They'll either hang around to see more, or become distant and not want you to bother them. Read their body language, and back off if necessary. BUT NEVER, EVER sit back down until they leave! Sitting Down, talking to a friend, or on the phone is the equivalent of leaving your booth. You may have left because now the customer knows you are no longer interested in them.

BE EXCITED about your merchandise! If someone asks you a question, get excited about it... tell them how much fun it is to do what you do! NEVER let someone know how you labored and almost threw that thing out the window, you hated making it and never want to make another! If you aren't interested in your merchandise, then why should the customer be? You took the time to make it, they are just checking it out!

When there isn't a customer in your booth. It's ok to take occasional breaks, but try to be active in your booth. Straighten merchandise, or clean up. Just keep moving and touching your merchandise. Don't look bored or worried. you have to look approachable and interesting. When soemone sees you straightening your merchandise, they'll be more apt to come in and see whats going on, than if you were hiding at the back of the booth, with your ipod in.

And the last thing I'll say is this:
No matter if you "made a killing" or lost money... ALWAYS BE PROUD OF YOUR ACCOMPLISHMENTS! You did a craft show! You were prepared! You got feedback from perfect strangers about your merchandise! YOU ROCK! It takes alot of guts to show people your handy work! But you did this! There are many, many crafters who would never imagine trying to sell their wares.... but you had enough confidence in yourself to give it a go! And if the first one bombs, who cares? You learned enough from your first show to know what to do differently at the next! And you will learn and one day you'll be so good at it, you could do it for a living!

So... I'm done now, and I hope this has helped! I've been in retail for the last 8 years or so, and I have learned alot from all the training and merchanding from my job. I try to incorporate that into craft show, and it has worked for me! I hope that this also works for you!

Friday, October 3, 2008

Product Review

A while back we sent baskets to expectant mothers over at CEM. We will be blogging their reviews of the products they recieved a little at a time. Here is another review of Abigail's Boutique Designs and Beautiful Bow Baby by one of our members:

I love this lotion from BasketsOfBeauty! It is so lightweight and absorbs easily. No greasy hands here! The fragrance is just right too. Not too light; not too much. Definitely a nice pick-me-up treat for yourself!

BasketsOfBeauty/ Abigail's Boutique Design also sent a cute little Hippo Clip. It's easy to take on and off and it is very well made. I don't have to worry about the hippo or the flower coming off. I love purple!

Thank You babemakes4!

What a beautiful headband with bow from Beautiful Bow Baby! The apricot color is a nice change from the usual pink and the bow is so sturdy. It survived the transit in perfect shape. This one will definitely hold up to little grabby fingers. It's very well put together and the headband part is very soft, yet sturdy enough to easily support the bow's weight.

Thank You Beautiful Bow Baby!